Showing posts with label tomcat. Show all posts

Wednesday, April 12, 2017

Lessons learned Docker microservices architecture with Spring Boot

Introduction

During my last project consisting of a Docker microservices architecture, built with Spring Boot, using RabbitMQ as communication channel, I learned a bunch of lessons, here's a summary of them.

Architecture

Below is a high level overview of the architecture that was used.


Docker

  • Run 1 process/service/application per docker container (or put stuff in init.d but that's not intended use of docker)

  • Starting background processes in the CMD cause container to exit. So either have a script waiting at the end (e.g tail -f /dev/null) or keep the process (i.e the one prefixed with CMD) running in the foreground. Other useful Dockerfile tips you can find here

  • As far as I can tell Docker checks if Dockerfile has changed, and if so, creates a new image instance (diffs only?)

  • Basic example to start RabbitMq docker image, as used in the build tool:

    $ docker pull 172.18.19.20/project/rabbitmq:latest
    docker rm -f build-server-rabbitmq
    $ # Map the RabbitMQ regular and console ports
    $ docker run -d -p 5672:5672 -p 15672:15672 --name build-server-rabbitmq 172.18.19.20/rabbitmq:latest

  • If there's no docker0 interface (check by running command ifconfig) then probably there are ^M characters in the config file at /etc/default/docker/docker.config. To fix it, perform a dos2unix on that file.

  • Check for errors at startup of docker in /var/log/upstart/docker.log

  • If your docker push <image> asks for a login (and you don't expect that) or it returns some weird html like "</html>" then you're probably missing the host in front of the image name, e.g: 172.18.19.20:6000/projectname/some-service:latest

  • Stuff like /var/log/messages is not visible in a Docker container, but is in its host! So look there for example to find out why a process is not starting/gets killed at startup without any useful logging (like we had with clamd)

  • How to remove old dangling unused docker images: docker rmi $(docker images --filter "dangling=true" -q --no-trunc)

Spring Boot

  • Some jackson2 dependencies were missing from the generated Spring Initializr project, noticed when creating unittests. These dependencies were additionally needed in scope test:

    <dependency>
      <groupid>com.fasterxml.jackson.core</groupid>
      <artifactid>jackson-databind</artifactid>
      <version>2.5.0</version></dependency>
    <dependency>
      <groupid>com.fasterxml.jackson.core</groupid>
      <artifactid>jackson-annotations</artifactid>
      <version>2.5.0</version></dependency>
    <dependency>
      <groupid>com.fasterxml.jackson.core</groupid>
      <artifactid>jackson-core</artifactid>
      <version>2.5.0</version></dependency>


    Not sure anymore why these then didn't get <scope>test</scope> then... Guess it was needed also in some regular code... :)

  • In the Spring Boot AMQP Quick Start the last param has name .with(queueName) during binding, but that's the topic key! (which is related to the binding key used at sending), so not the queue name.

  • Spring Boot Actuator's /health will check all related dependencies! So if you have a dependency in your pom.xml to a project which uses spring-boot-starter-amqp, /health will check now for an AMQP queue being up! So add a for those if you don't want that.

  • Spring Boot's default AppAplicationIT probably needs a @DirtiesContext for your tests, otherwise the tests might re-use or create more beans than you think (we saw that in our message receiver tests helper class).

  • @Transactional in Spring: by default only for unchecked exceptions!! It's documented but still a thing to watch out for.

  • And of course: Spring's @Transactional does not work on private methods (due to proxy stuff it creates)

  • To see in Spring Boot the transaction logging, put this in application.properties:

    logging.level.org.springframework.jdbc=TRACE
    logging.level.org.springframework.transaction=TRACE


    Note that by default @Transactional just rolls back, it does not log anything, so if you don't log your runtime exceptions, you won't see much in your logs.

  • mockMvc from spring is not really invoking from "outside", our spring sec context filter (for which you can use @Secured(role)) was allowing calls while no authentication was provided for. RestTemplate seems to work from "the outside".

  • Scan order can mess up @ControllerAdvice error handler it seems. Had to change the order sometimes:

    Setup:
    - Controller is in: com.company.request.web.
    - General error controller is in com.company.common package.

    Had to change
    @ComponentScan(value = {"com.company.security", "com.company.common", "com.company.cassandra", "com.company.module", "com.company.request"})

    to

    @ComponentScan(value = {"com.company.security", "com.company.cassandra", "com.company.module", "com.company.request", "com.company.common"})

    Note that the general error controller has now been put in last

  • Spring Boot footprint seems relatively big especially for microservices. At least 500MB or something is needed, so we have quite big machines for about 20 services. Maybe plain Spring (iso Spring boot) might be more lightweight...

Bamboo build server

  • When Bamboo gets slow and the CPU seems quite busy and memory availability on its server seems fine, increase the Xmss and Xmsx (or related). Found this out because the java Bamboo process was running out of heap sometimes, increasing heap also fixed performance.

  • To have Bamboo builds fail on quality gates not met in SonarQube, install in Sonar the build breaker plugin. See the plugin docs and Update Center. This FAQ says so.

Stash

  • The Stash (now called Bitbucket) API: in /rest/git/1.0/projects/{projectKey}/repos/{repositorySlug}/tags a 'slug' is just a repository name. 

Microservices with event based architecture

  • When you do microservices, IMMEDIATELY take into account during coding + reviews that multiple instances can do concurrent access to database.

    This has affect on your queries. Most likely correct implementation for uniqueness check on inserts:
    1- add unique constraint
    2- run insert
    3- catch uniqueness exception --> you know it already exists. Solution with SELECT NOT EXISTS is not guaranteed unique.

  • Also take deleting of data (e.g user deletes himself) into account from the start. Especially when using events and/or eventual consistency in combination with an account-balance or similar. Because what if one services in the whole chain of things to execute for a delete fails? Has the user still some money left on his/her account then? In short: take care of CRUD.

  • Multiple services are sending the same event? That can indicate 2 services are doing the same thing --> Not good probably.

  • Microservices advantages:

    - Forces you to better think about where to put stuff in comparison to monolith where you more often can be tempted to "just do a quick fix".
    - language independency for service implementation: choose the best language for the job

    Disadvantages:
    - more time needed for design
    - eventual consistency is quite tough to understand & work with, also conceptually
    - infrastructure is more complex including all communication between services

    More cons can be found here.

Tomcat

  • Limit the maximum size of what can be posted to a servlet is not as easy as it seems for REST services:

    - maxPostSize in Tomcat is enforced only for specific contenttype: Tomcat only enforces that limit if the content type is application/x-www-form-urlencoded

    - And the other 3 below XML options are for multipart only:

    <multipart-config>
      <!-- 52MB max -->
      <max-file-size>52428800</max-file-size>
      <max-request-size>52428800</max-request-size>
      <file-size-threshold>0</file-size-threshold></multipart-config>


    So that one won't work for uploading just a byte[]. The only solution is in the servlet (e.g Spring @Controller) you'll have to check for the limit you want to allow.

  • maxthreads seems set to be unlimited by default or something. 50 seems to perform better. (workerthreads) 

Security

  • To securely generate a random number: SecureRandom randomGenerator = SecureRandom.getInstance("NativePRNG");

  • Good explanation of secure use of a salt to use for hashing can be found here

Cassandra

  • Unique constraints are not possible in Cassandra, so there you will even have to implement unique constraints in the business logic (and make it eventually consistent)

  • CassandraOperations query for one field:

    Select select = QueryBuilder.select(MultiplePaymentRequestRequesterEntityKey.ID).from(MultiplePaymentRequestRequesterEntity.TABLE_NAME);
    select.setConsistencyLevel(ConsistencyLevel.LOCAL_QUORUM);
    select.where(QueryBuilder.eq(MultiplePaymentRequestRequesterEntityKey.REQUESTER, requester));
    return cassandraTemplate.queryForList(select, UUID.class);


    See also here.

  • Note below two keys don't seem to get picked up by Cassandra in the Spring Data Cassandra version 1.1.4.RELEASE:  

    <groupid>org.springframework.data</groupid>
    <artifactid>spring-data-cassandra</artifactid>

    @PrimaryKeyColumn(name = OTHER_USER_ID, ordinal = 0, type = PrimaryKeyType.PARTITIONED)
    @CassandraType(type = DataType.Name.UUID)
    private UUID meUserId;

    @PrimaryKeyColumn(name = ME_USER_ID, ordinal = 1, type = PrimaryKeyType.CLUSTERED)
    @CassandraType(type = DataType.Name.UUID)
    private UUID meId;

    This *does* get picked up: put it into a separate class:

    @Data
    @AllArgsConstructor
    @PrimaryKeyClass
    public class HistoryKey implements Serializable {

      @PrimaryKeyColumn(name = HistoryEntity.ME_USER_ID, ordinal = 0, type = PrimaryKeyType.PARTITIONED)
      @CassandraType(type = DataType.Name.UUID)
      private UUID meUserId;

      @PrimaryKeyColumn(name = HistoryEntity.OTHER_USER_ID, ordinal = 1, type = PrimaryKeyType.PARTITIONED)
      @CassandraType(type = DataType.Name.UUID)
      private UUID otherUserId;

      @PrimaryKeyColumn(name = HistoryEntity.CREATED, ordinal = 2, type = PrimaryKeyType.CLUSTERED, ordering = Ordering.DESCENDING)
      private Date created;

    }

  • Don't use Cassandra for all types of use cases. An RDMS still has its value, e.g for ACID requirements. Cassandra is eventually consistent.

Kubernetes

Miscellaneous

  • Use dig for DNS resolving problems

  • Use pgAdmin III for PostgreSQL GUI

  • To stop SonarQube complaining about unused private fields when using Lombok @Data annotation: add to each of those classes @SuppressWarnings("PMD.UnusedPrivateField")

  • Managed to not need transactions nor XA transactions for message publishing, message reading, store db, message sending, by using the confirm + ack mechanism.
    And allow message to be read again. DB then sees: oh already stored (or do an upsert).
    So,when processing message from the queue:
    1- store in db
    2- send message on queue
    3- only then ack back to queue that read was successful

  • Performance: instantiate the Jackson2 ObjectMapper once as static, not in each call, so:
    private static final ObjectMapper mapper = new ObjectMapper();
  • Javascript: when an exception occurs in a callback and it is not handled, processing just ends. Promises have better error handling.

  • clamd would not start correctly; it would try to start but then show 'Killed' when started via the commandline. Turns out it runs out of memory when starting up.  Though we had enough RAM (16G total, 3G free), it turns out clamd needs swap configured!

  • Linux bash shell script to loop through projects for tagging with projects with spaces in their name:

    PROJECTS="
      project1
      project space2
    ";
    IFS=$'\n'
    for PROJECT in $PROJECTS
    do
      TRIM_LEADING_SPACE_PROJECT="$(echo -e "${PROJECT}" | sed -e 's/^[[:space:]]*//')"
      echo "Cloning '$TRIM_LEADING_SPACE_PROJECT'"
      git clone --depth=1 http://$USER:$GITPASSWD@github.com/projects/$TRIM_LEADING_SPACE_PROJECT.git
    done

  • OpenVPN in Windows 10: Sometimes it hangs on "Connecting..."  It doesn't show the popup to enter username/pwd. Go to View logs. Then when you see: Enter management password in the logs: ???? you have to kill the OpenVPN Daemon under Processes tab (windows taskmanager). The service is stopped when exiting the app but that's not enough!

  • javascript/nodejs log every call that comes in:

    app.use(function (req, res, next) {
      console.log('Incoming request = ' + new Date(), req.method, req.url);
      logger.debug('log at debug level');
      next()
    }

  • If ever your mouse is suddenly not working anymore your VirtualBox guest, kill the process in your guest-machine mentioned in comment 5 here. After that the mouse works again in your vbox guest.

  • Fix Firefox to version 45.0.0 for selenium driver tests:

    sudo apt-get install -y firefox=45.0.2+build1-0ubuntu1
    sudo apt-mark hold firefox

  • Setting the cookie attribute Secure (indicating cookie should only be sent over httpS) can be seen when using curl to request the URL(s) that should send that cookie plus the new attribute, even when using HTTP. See also my previous post.

    But when using a browser and HTTP, you probably won't see the secure cookie appear in the cookie store. This is (probably) because the browser knows not to store it in that case because it's HTTP being used.

  • Idempotency within services is key for resilience and be able to resend an event or perform an API call again.

Wednesday, February 10, 2016

Tomcat 7 request processing threading architecture and performance tuning

Tomcat has many parameters for performance tuning (see http://tomcat.apache.org/tomcat-7.0-doc/config/http.html), but for some attribute descriptions it is not a 100% clear how some properties affect each other.

A pretty good explanation regarding acceptCount and maxThreads can be found here: http://techblog.netflix.com/2015/07/tuning-tomcat-for-high-throughput-fail.html 
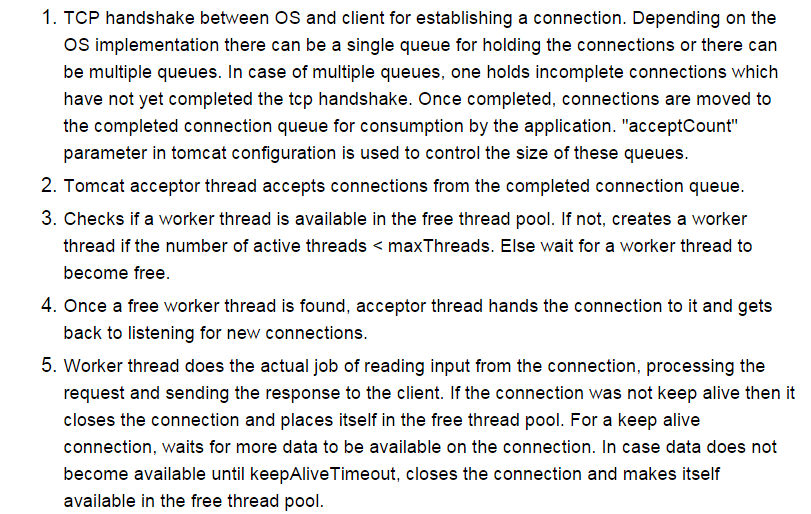
But that article is missing a ... picture! That's what I tried to create here, with the numbers 1-5 indicating the steps described in the above article:


Just in case should the Netflix URL ever get lost and for easy reference, here's the 5 steps:


The Tomcat attribute maxThreads worked best in my case with value 50, as it won't saturate the machine/CPU. (due to too many workerthreads, many context-switches)


To set maxThreads when using Spring Boot + embedded Tomcat: http://stackoverflow.com/questions/31432514/how-to-modify-tomcat8-acceptcount-in-spring-boot


Other remarks


Referenced material


Sunday, February 21, 2010

Best of this Week Summary 15 February - 21 February 2010

  • Expected that Mozilla uses Agile everywhere, and definitely on its flagship Firefox? Think again, only recently they started to combine Agile and more traditional Waterfall as their new development model, dubbed "Lorentz".

  • Tips for hardening your Tomcat installation. Other implementation guides, not only limited to Tomcat (also for example WebLogic) tips from U.S. DOD DISA (Defense Information Systems Agency) can be found here.

  • Always interesting to at least quickly browse through: a review of the 1993 code of Doom. And more "today": the code of Doom for the iPhone reviewed.

  • Think you know Javascript? Try one of these quizes!

Sunday, November 22, 2009

Best of this Week Summary 16 November - 22 November 2009

Thursday, January 15, 2009

Setting up an Amazon AMI with Java and MySQL on EBS using the AWS Management Console

Introduction

In this post I'll describe the steps I performed to create my own Amazon Machine Image using the AWS Management Console and Windows XP as my local machine.
Just recently Amazon released their AWS Management Console. It's still in beta, but it makes life already so much easier: before it was available, you had to use quite a few scripts to get your own AMI ready.

The final AMI will have installed on it:

  • Fedora Core 8

  • 32-bit architecture

  • Java JDK 7 (1.7.0)

  • JEE 5

  • Tomcat 5.5.27

  • Apache 2.2.9

  • MySQL 5.0.45

I also will setup MySQL on Elastic Block Storage such that you can shutdown the AMI and not lose your MySQL data.
In the end you should be able to deploy for example a Java .war file (if correctly assembled of course) with the following frameworks without any problem:

  • Spring 2.5

  • Hibernate 3.2.5

  • Wicket 1.3

  • Sitemesh 2.2.1

  • Quartz 1.6.2

For the steps described below, I'm assuming you've already setup your keys and know how to start an AMI and get access to it via a browser and putty. If you don't know how to do this, on the AMC homepage there's a good introductionary video on how to do this.

Starting up an instance

You can start with a very basic AMI with only an OS installed on it, or use one that has already a lot more software installed on it.
As a starting point I used the publicly available Java Web Starter AMI. Notice that you can lookup AMIs without being logged in into AWS.
Start the instance such that you see something like this:


Check that Tomcat is running by going to the public IP of the instance. In my case I had to go to http://ec2-174-129-150-80.compute-1.amazonaws.com/. And I do see Tomcat:


Setting up MySQL and Tomcat passwords

In the basic AMI I'm using, MySQL root has no password and the Tomcat Manager login is admin/password. You don't want that in your final version, so let's change that. First login with putty to the instance (don't forget to use the ppk version of the key). You can login as root w/o a password because the key takes care of the authentication. Then change the passwords:
  1. MySQL password: login to mysql:


    mysql -u root


    And execute:


    GRANT ALL ON *.* to 'root'@'localhost' IDENTIFIED BY 'mysecretpassword'.


    Note that we're only allowing root access from the localhost (the AMI itself) and of course replace the 'mysecretpassword' text for your own password. Double check that you can now login with the new password. If not, you might have to restart the AMI (all changes are lost) and try again.

  2. Tomcat password:


    cd /usr/share/tomcat5/conf.


    Edit tomcat-users.xml, change the password field with value 'password' where it says username="admin" to your desired new password. Restart Tomcat to let the change take effect: /etc/init.d/tomcat5 restart. Go to your instance again with your browser and check that the new Tomcat Manager login works.


If there's anything else you like to change on your AMI, you should do it now, for as long as you don't terminate the AMI instance. Tip: Reboot is fine btw, that keeps the AMI settings!

Setting up MySQL on Amazon EC2 with Elastic Block Store

As a basis for these steps I'll be using "Running MySQL on Amazon EC2 with Elastic Block Store". The steps given in there are written prior to the Amazon AWS Management Console being available, so here I'll describe the changes necessary using the AMC. The steps in the article are also specificly for Ubuntu 8.04 LTS, but as you can see from the AMI I use as a starting point, I'm using Fedora 8. Only some of the commands differ, for the rest the steps work for both OSs. Í'll also be setting up Ext3 as filesystem, not XFS.
  1. Create an EBS volume with the AMC: click on Volumes on the left and click on the 'Create Volume' button. Enter the required capacity. AFAIK as long as you're not using the datablocks, you're not charged. So I put in 25GB as size. Select a zone (don't know how much it matters which one you pick, just make sure you stay in the same zone as your AMI). This should result in something like this:


    Now attach the volume to the instance as device /dev/sdf (in the original article sdh is used) via the 'Attach Volume' button. When successful, the 'Attachment Information' status field has changed to "attached":


  2. Now let's format the volume and mount it. For that I deviated from the article and followed the steps you can also see when you click on the 'Help' button on the (current) EBS Volumes page in AMC. Thus execute in your putty session:


    mkfs -t ext3 /dev/sdf


    Hit OK on any questions. Then create a directory to mount the EBS volume on. Let's use a more distintive name than '/vol'. Let's create:


    mkdir /ebsmnt


    Then mount it:


    mount /dev/sdf /ebsmnt


    Note: at my first effort, I wanted to use /mnt/data (in the Volumes 'Help' button in the AMC they also give /mnt as an example), so I created that directory. But: the bundling command you'll see below does not include the /mnt directory by default! So then the /mnt/data directory doesn't exist on the new AMI, and then the auto-mount from fstab at bootup of the AMI will always fail for that reason!

  3. Make sure the mount is performed at startup by adding it in /etc/fstab:


    /dev/sdf /ebsmnt ext3 defaults 0 0


  4. Backup the new config file to the EBS into its own separate directory, maybe you need it some time:


    mkdir /ebsmnt/configs
    rsync -a /etc/fstab /ebsmnt/configs/


Now let's tell MySQL to use the EBS volume to store its databases.
  1. Stop MySQL:


    /etc/init.d/mysqld stop


    And to be safe:


    killall mysqld_safe


  2. Move the existing database files. Since there isn't much yet except a couple of test databases, not much needs to be done. First let's make a separate dir for MySQL on the EBS volume:


    mkdir /ebsmnt/mysql


    Then:


    cd /ebsmnt/mysql
    mkdir lib log


    And start moving stuff:


    mv /var/lib/mysql /ebsmnt/mysql/lib/
    mkdir /var/lib/mysql # Note that we need this dir for the mysql.sock file
    chown mysql:mysql /var/lib/mysql # Give it again the correct permissions
    mv /var/log/mysqld.log /ebsmnt/mysql/log/


  3. Tell MySQL to look on the mounted EBS from now on. Edit /etc/my.cnf and change it as below. The '# Was: ' indicates wat was there originally:


    [mysqld]
    # Was: datadir=/var/lib/mysql
    datadir=/ebsmnt/mysql/lib/mysql
    socket=/var/lib/mysql/mysql.sock
    user=mysql
    # Default to using old password format for compatibility with mysql 3.x
    # clients (those using the mysqlclient10 compatibility package).
    old_passwords=1

    [mysqld_safe]
    # Was: log-error=/var/log/mysqld.log
    log-error=/ebsmnt/mysql/log/mysqld.log
    pid-file=/var/run/mysqld/mysqld.pid


    Note that I put the log-error file also on the mount. The reason for this is that I want to have to logfile saved even when I shutdown an instance. If you don't care, you can leave it as it was.
    Another advantage I found out by practice is that when you've set the log-error like above, you can't detach the volume because MySQL is still accessing that logfile. So you can't accidentally detach, maybe leaving MySQL in an inconsistent state, which is a good thing (I mean not leaving MySQL in an inconsistent state).
    In that case you'll have to stop your instance w/o detaching it first (this makes sure MySQL shutsdown first). Update: as far as I can tell from /etc/rc.d, unmounting from fstab is done as the last thing, so doing a 'Terminate' of the instance to automatically let the shutdown sequence do the unmount and unattach of the volume should be safe.
    Note also that I didn't modify the mysql.sock socket file. Advantage is that I can keep using mysql and mysqladmin the way they are. If you would change the location of the socket file, say to /ebsmnt/mysql/lib/mysql/mysql.sock, then you will have to start mysql and mysqladmin with the '-S ' option.

  4. Backup the new config file to the EBS, just to be safe:


    rsync -a /etc/my.cnf /mnt/configs/


  5. Restart MySQL again:


    /etc/init.d/mysqld start


    You can check everything is going ok by tailing the logfile (on the mount of course):


    tail -f /ebsmnt/mysql/log/mysqld.log


  6. To see later on that the data is still available after having terminated the AMI, create an example database:


    mysql -p -e 'CREATE DATABASE esb_test_database'


So now the database is setup on the EBS. If you want to create snapshots, you can do that via the AWS Console or follow the instructions in the mentioned article, which also includes automated snapshots and cleaning up everything that has been created in EBS when following the above steps (handy to know, because otherwise you'll be charged for using it until the end of time! hahahahaaa).

So now the AMI is how I want it to be. Let's store it on S3 to make it persistent.

Bundling the new Linux AMI

This part is based upon Bundling a Linux or UNIX AMI from the online EC2 Developer Guide. There's currently almost no AWS Management Console facilities to do this, so we'll have to use the AMI Tools on the host AMI.

  1. Installing the AMI Tools: luckily they are already installed on the AMI we're using (how you'd think it got created? :-). Try this command to see that they are indeed installed (well of course that only proves this one is installed ;-):


    ec2-bundle-image --manual


    If you're using an AMI that doesn't have these tools installed, follow the steps in section 'Installing the AMI Tools' in the article.

  2. Bundling an AMI Using the AMI Tools: Let's do the bundling in /tmp:


    cd /tmp


    Then to bundle execute:


    ec2-bundle-vol --prefix Fedora8-JEE5-JDK7-Tomcat55-MySQL50 -k
    <private_keyfile> -c <certificate_file> -u <user_id>


    Note that I specify a prefix. By default it's 'image', so you'll get 'image.manifest.xml'. When you look at all the AMIs out there, they should be more descriptive than that, so I used Fedora8-JEE5-JDK7-Tomcat55-MySQL50.
    The other parameters are explained in the article. The user_id you can find in the AMC under the 'Your Account --> Account Activity' menu.
    Your private_keyfile is the pk*.pem file, which you need to upload to the AMI (host). The same goes for the cert*.pem file. Note I put them in /mnt so they won't get put on the new AMI, which you don't want!
    An example pscp copy from Windows command prompt to get the files over would be:


    pscp -i Fedora8.ppk pk*.pem cert*.pem
    root@ec2-174-129-150-80.compute-1.amazonaws.com:/mnt/


    Fedora8.ppk is the filename of the key generated for putty with puttygen, as clearly described in the before-mentioned video on the AMC homepage.
    You can accept all the defaults at the prompts.
    The warnings:


    "NOTE: rsync with preservation of extended file attributes failed. Retrying
    rsync without attempting to preserve extended file attributes..."


    and


    "NOTE: rsync seemed successful but exited with error code 23. This probably means
    that your version of rsync was built against a kernel with HAVE_LUTIMES defined,
    although the current kernel was not built with this option enabled. The bundling
    process will thus ignore the error and continue bundling. If bundling completes
    successfully, your image should be perfectly usable. We, however, recommend that
    you install a version of rsync that handles this situation more elegantly.
    "

    are (apparently) no serious problem, so these can be ignored.


    Note that a file with the same name as the --prefix parameter gets created in the directory where you started the command.
    Notice from the manual of the above command, that it skips /mnt (amongst others), so in case you mounted it there, the command won't include the whole mounted EBS in the bundle (luckily)!
    Note also that it seems the script is smart enough to not include the mounted /ebsmnt data either. If you want to be really sure, umount it first before running the bundle command.
    Running the command takes about 5-10 minutes.
    The message


    "Unable to read instance meta-data for product-codes"


    at the end does not seem to be a serious problem, I haven't found any problems at least :-).

Uploading a Bundled AMI

Here you can just follow the steps in the article, thus:


ec2-upload-bundle -b <bucket> -m Fedora8-JEE5-JDK7-Tomcat55-MySQL50.manifest.xml
-a <access_key> -s <secret_key>


The two keys should be under the menu 'Your Account --> Access Identifiers' in the AWS Mangement Console.
You can imagine being a directory in your S3 storage. Let's use "mybucket" as name.

Registering the AMI

There are two ways of registering. Via the AMC is described first. Then the old way via the Amazon EC2 API command line tools as in the article is described.

Via AWS Console
  1. Go to the 'AMIs' page and click the 'Register New AMI' button.

  2. In the popup enter the path to your above uploaded manifest file, including the bucket. So the whole path becomes:


    http://s3.amazonaws.com:80/mybucket/Fedora8-JEE5-JDK7-Tomcat55-MySQL50.manifest.xml


    Thus the popup would look something like this:


  3. Hit 'Register' to register the AMI. Too late for this tutorial I noticed this 'Register New AMI' button, thus here my personal practical experience ends for this option. I used the command line tools as described below. But I guess the result will be the same: a registered AMI!

Via Amazon EC2 API command line tools

For this I used the steps described here in the AWS Developer Guide.
For this you need to download and install the Amazon EC2 API command line tools on your local machine and a Java Runtime, I just used the Java 5 JDK.
Then run:


ec2-register mybucket/Fedora8-JEE5-JDK7-Tomcat55-MySQL50.manifest.xml


where mybucket is the you specified in the above 'ec2-upload-bundle' command.
It returns the id of the created AMI, e.g.


IMAGE ami-aabb5cc3


Now check that you can find it in the AMIs 'Owned By Me' in the AMC by searching for the above AMI ID ami-aabb5cc3. And yes there it is:


If you want, you can make it public such that other users can see it etc. But I won't describe that here.

That's it! And as final step:

Let's see if the new AMI actually works

Let's see if it starts up, the EBS volume can be connected to it and the newly created test database is still there.
First terminate the running (modified) AMI. Note that you can't detach, since MySQL still uses the volume!
Start the new AMI. Now the problem is that you can't attach until Fedora OS is starting to boot. But /ebsmnt can't be mounted until it is attached! Thus MySQL can't find its data.
So what you can do is run the 'ec2-attach-volume' command until it succeeds, or check the instance status until it reaches a "specific intermediate state" and then run the ec2-attach-volume command. This way you "hope" that the attachment succeeds before the mounting. I never managed to get this working.
The safest solution seems to attach the volume when the AMI has reached status 'running', and then reboot the instance.
Of course you can put this all in scripts to automate it as much as possible.

Note that my AWS Mangement Console did not show my newly running AMI instance when trying to attach a volume via the AMC. There might be some delay in status updates(?). The command 'ec2-attach-volume' did work in that case. An example of that command on your local workstation:


ec2-attach-volume -d /dev/sdf -i i-ec8f0e85 vol-52d4303b


Also don't forget to use the same zone for the volume and the instance, otherwise you also might not see the running instance in the 'Attach' popup window.

Done

Did you notice BTW what a large amount of memory you get, even for a small AMI instance:


Mem: 1747764k total, 176724k used, 1571040k free, 12236k buffers
Swap: 917496k total, 0k used, 917496k free, 64340k cached


Tip: for managing your AMI and other data that you (want to) store on Simple Storage Service S3, you can either use the more manual tools from Amazon or the great graphical Amazon S3 Firefox Organizer (S3Fox) Firefox plugin.

Sunday, November 9, 2008

Best of this Week Summary 03 November - 09 November 2008

Sunday, January 27, 2008

Best of this Week Summary 21 January - 27 January 2008

  • Nice routing pattern for webservices that need to provide both synchronous and a-synchronous calls. You can even make the router such that depending on certain criteria (like load, response time), it will either turn the call into an a-synchronous call when needed. Disadavantage of this approach is of course that the caller has to be able to support both an a-synchronous and a synchronous version of each call. Related patterns you can find in these seven Self-Service: select application patterns.

  • An effort to give answer to the question whether Tomcat is an application server or not. GREAT introduction to JEE btw, so good read for beginners or as a refresher. The answer: Tomcat does not support the entire Java EE stack: no distributed transactions, EJBs, and JMS.

  • IBM made their Jazz tool available for the public. It can be used to "build a scalable, extensible team collaboration platform for integrating work across the phases of the development lifecycle." Note that it is not fully opensource yet. There's also a Mylyn connector available for Jazz.

  • Version 3.0.0 of HTML Purifier has been released. It will scan your HTML for malicious XSS code, check for compliance and will try to fix your code.

  • Summary of a statement made by Bruce Eckel in this article that Java should not change much anymore: it should stop growing and just become stable, and Sun should focus on optimizing/extending the JVM. Interesting considerations.

  • And finally for this week, for the developers among us, a bunch of shortcut keys in Eclipse you might not know about.

  • The Open Source hardening Project of the US Homeland Security department together with Coverity has led to the milestone where in 11 opensource projects all main bugs have been fixed. These 11 have been moved up to the new level Rung 2. Here you can see all the results of the scan.

Saturday, December 29, 2007

Best of this Week Summary 17 December - 29 December 2007

  • Always interesting, a look inside "the kitchen of": the people from 37signals.com have provided some inside-info on the architecture of some of their sites: Backpack en Basecamp. For
    example they are using RoR, MySQL, S3 and memcached.

  • Post (related to the ESB entry in my post last week) regarding the rise of Tomcat as "application" server, in relation with the rise of Spring. Comparing Tomcat with WebLogic and WebSphere is more like comparing Oracle with MySQL. Tomcat is still not at the same level in certain areas as WebLogic and WebSphere, though it is making progress in these areas: clustering and high availability.

  • There's a new revised version of the free e-book from Microsoft on the most important security engineering activities that you should have in your development process: The Developer Highway Code. Written by Paul Maher (Microsoft UK) and Alex Mackman (CM Group Ltd).

  • Great news, version 2.0 of SoapIU has just been released. Improvements include webservice WSDL coverage and WS-Security completely refactored.

Sunday, December 23, 2007

Best of this Week Summary 16 December - 23 December 2007

  • Nice set of 10 lessons learned from designing and building a high transaction database (Microsoft SQL Server). The system was required to support 35K tps.

  • Reasonable comparison of 3 open source applicationservers: JBoss 4.2, Geronimo 2 and Tomcat 6. Geronimo comes out as most complete. Tomcat is a bit odd in this comparison, it is more a servlet/web-container than a full applicationserver. Glassfish for example would have fitted better here. Here's some The ServerSide feedback on it.

  • In this article Paul Fremantle discusses the fundamentals of the Enterprise Service Bus concept. His point is that the model of ESB sometimes might be converting into an anti-SOA pattern: the conversion of the formats happens in the ESB instead of happening at the service providers (the endpoints). Thus you would need a central ESB team that needs to deal with each application, its format and protocol the ESB needs to interface with. Note that the author is owner of the WSO2 ESB, his company and also works on Apache Synapse. As he claims these tools are designed from the ground up to match the original idea of SOA: the owners of the services take responsibility to define a clean and simple interface.