Showing posts with label mysql. Show all posts

Wednesday, November 16, 2022

Spring JDBC and MySql using UUIDs in Java and VARCHAR(36) in database incorrect string value solution

Introduction

Using H2 as initial embedded database for a Spring Boot application worked fine. H2 is very forgiving in many situations and of course only tries to emulate the real target database, in this case MySql 8.0.
So after connecting my Spring Boot application to MySql, this error started to appear when inserting a row in a table with a java.util.UUID property as 'id' field:  

    java.sql.SQLException: Incorrect string value: '\xAC\xED\x00\x05sr...' for column 'id' at row 1

A quick internet search showed that potentially my character set and collate setting for the tables were using 3 bytes instead of 4 for UTF-8 storage.
But the database, tables and columns all had utf8mb4 specified as CHARACTER SET and COLLATE, since I'm using MySql 8.0. So that 3 vs 4 bytes for UTF-8 issue did not apply for me. 

Solution

Then I found this blog https://petrepopescu.tech/2021/01/how-to-use-string-uuid-in-hibernate-with-mysql/ that at least when using Hibernate, it doesn't know how to convert UUIDs to strings (varchars), and you need to specify a Hibernate-provided converter. But the Hibernate annotation of course did not work for Spring Data JDBC.

Luckily there is a way to write your own converters for Spring JDBC datatypes.

Implementing that fixed that initial error message. Note the example in the above post is missing the @Configuration annotation on the MyJdbcConfiguration class.

But then the error happened again during this custom JdbcTemplate select query:

    String query = "SELECT DISTINCT r.id, user_id FROM recipe r WHERE user_id = ?";
    List<Object> parameterValues = new ArrayList<>();
    parameterValues.add(userId);
    Object[] parameterValuesArray = parameterValues.toArray();
    jdbcTemplate.query(query, parameterValuesArray, new JdbcRecipeRowMapper());


This was the output of that query, including the parameters used in the query:

Executing prepared SQL statement [SELECT DISTINCT r.id, user_id, r.name, vegetarian, number_of_servings, instructions, r.created_at, r.updated_at FROM recipe r INNER JOIN ingredient i ON r.id = i.recipe_id WHERE user_id = ? AND vegetarian = ? AND number_of_servings = ? AND instructions LIKE ? AND  i.name IN (?) ]
2022-09-14 15:46:38.062 TRACE 16148 --- [nio-7000-exec-2] o.s.jdbc.core.StatementCreatorUtils      : Setting SQL statement parameter value: column index 1, parameter value [e26b2a0a-3d2c-442f-8fa1-f26336d5a9d3], value class [java.util.UUID], SQL type unknown
2022-09-14 15:46:38.068 TRACE 16148 --- [nio-7000-exec-2] o.s.jdbc.core.StatementCreatorUtils      : Setting SQL statement parameter value: column index 2, parameter value [true], value class [java.lang.Boolean], SQL type unknown
2022-09-14 15:46:38.068 TRACE 16148 --- [nio-7000-exec-2] o.s.jdbc.core.StatementCreatorUtils      : Setting SQL statement parameter value: column index 3, parameter value [3], value class [java.lang.String], SQL type unknown
2022-09-14 15:46:38.068 TRACE 16148 --- [nio-7000-exec-2] o.s.jdbc.core.StatementCreatorUtils      : Setting SQL statement parameter value: column index 4, parameter value [%Step%], value class [java.lang.String], SQL type unknown
2022-09-14 15:46:38.068 TRACE 16148 --- [nio-7000-exec-2] o.s.jdbc.core.StatementCreatorUtils      : Setting SQL statement parameter value: column index 5, parameter value [spinach], value class [java.lang.String], SQL type unknown
2022-09-14 16:06:37.952 DEBUG 19748 --- [nio-7000-exec-2] o.s.jdbc.core.JdbcTemplate               : SQLWarning ignored: SQL state 'HY000', error code '1366', message [Incorrect string value: '\xAC\xED\x00\x05sr...' for column 'user_id' at row 1]

So that only shows a warning message at DEBUG level, not even as an error, so at first I missed it completely! The query just returned 0 results.

    SQLWarning ignored: SQL state 'HY000', error code '1366', message [Incorrect string value: '\xAC\xED\x00\x05sr...' for column 'user_id' at row 1]

Makes sense though that this custom query has the same issue, since my string-based query of course does not use the converters that I configured earlier.
So I had to change the third line to explicitly convert the value to a string, so Spring JDBC will pass it on as a string:

        parameterValues.add(userId.toString());

Note: maybe implementing a placeholder interface for each repository like this would also have fixed it for the Spring generated methods/queries like save(), remove() etc, e.g: interface RecipeRepository extends Repository<Recipe, UUID>. Did not try that out.

Other related links used to get to the above solution:


Wednesday, September 14, 2022

Connection refused Spring Boot application to MySql in Docker solution

Introduction

The Spring Boot Java application was initially using the H2 embedded database, first the in-memory version (losing all data each run), then the file based version. The database structure is created using Liquibase.

Then the requirement was to have the Spring Boot Java application still not dockerized (just started with mvn spring-boot:run), but have it connect to a MySql 8 database than runs inside a Docker container. Most examples you can find have also the Spring Boot application in a Docker container.
The official Spring documentation only shortly mentions the possibility of running MySql in Docker, but no more details on how to do that: https://spring.io/guides/gs/accessing-data-mysql/

This is how the setup should be working:


I set up that docker container using the Windows 10 WSL 1 shell within IntelliJ (note WSL 2 is now recommended):

docker pull mysql/mysql-server:8.0
docker run --name recipesmysql8 -d mysql/mysql-server:8.0

After changing the One Time Password (OTP) for root, creating the database user, creating a 'recipes' database, this is how docker ps looked:

CONTAINER ID        IMAGE                    COMMAND                  CREATED             STATUS                PORTS                       NAMES
3a507fc66690        mysql/mysql-server:8.0   "/entrypoint.sh mysq…"   6 days ago          Up 6 days (healthy)   3306/tcp, 33060-33061/tcp   recipesmysql8

And MySql is indeed running: docker logs recipesmysql8 shows:

2022-08-31T19:02:05.722742Z 0 [System] [MY-010116] [Server] /usr/sbin/mysqld (mysqld 8.0.30) starting as process 1
2022-08-31T19:02:05.755538Z 1 [System] [MY-013576] [InnoDB] InnoDB initialization has started.
2022-08-31T19:02:06.104813Z 1 [System] [MY-013577] [InnoDB] InnoDB initialization has ended.
2022-08-31T19:02:06.416522Z 0 [Warning] [MY-010068] [Server] CA certificate ca.pem is self signed.
2022-08-31T19:02:06.416574Z 0 [System] [MY-013602] [Server] Channel mysql_main configured to support TLS. Encrypted connections are now supported for this channel.
2022-08-31T19:02:06.443572Z 0 [System] [MY-011323] [Server] X Plugin ready for connections. Bind-address: '::' port: 33060, socket: /var/run/mysqld/mysqlx.sock
2022-08-31T19:02:06.443740Z 0 [System] [MY-010931] [Server] /usr/sbin/mysqld: ready for connections. Version: '8.0.30'  socket: '/var/lib/mysql/mysql.sock'  port: 3306  MyS
QL Community Server - GPL.


So all running fine, ports seemed fine. The Spring Boot application configuration for JDBC is this:

spring.datasource.url=jdbc:mysql://localhost:3306/recipes
spring.datasource.username=recipes
spring.datasource.password=mypasswd
spring.datasource.driver-class-name=com.mysql.cj.jdbc.Driver

But then the mvn spring-boot:run gave this relatively vague error:

com.mysql.cj.jdbc.exceptions.CommunicationsException: Communications link failure
The last packet sent successfully to the server was 0 milliseconds ago. The driver has not received any packets from the server.
    ...
   Caused by: java.net.ConnectException: Connection refused: no further information

So unable to connect, but why? It does not seem an incorrect username/password combination, then I would expect some unauthorized/not authenticated type of message.
Then I found this handy command determining what the real IP should be of the machine that the MySql docker runs in:

docker inspect -f '{{.Name}} - {{range .NetworkSettings.Networks}}{{.IPAddress}}{{end}}' $(docker ps -aq)

I found my MySql container at: /recipesmysql8 - 172.17.0.2
Same result, shorter answer: docker inspect -f '{{range.NetworkSettings.Networks}}{{.IPAddress}}{{end}}' recipesmysql8
Or even just without the filtering: docker inspect recipesmysql8

So the JDBC configuration I changed to:

spring.datasource.url=jdbc:mysql://172.17.0.2:3306/recipes
spring.datasource.username=recipes
spring.datasource.password=mypasswd
spring.datasource.driver-class-name=com.mysql.cj.jdbc.Driver

But then the mvn spring-boot:run gave this timeout error:

Caused by: com.mysql.cj.exceptions.CJCommunicationsException: Communications link failure
The last packet sent successfully to the server was 0 milliseconds ago. The driver has not received any packets from the server.
    ...
    Caused by: java.net.ConnectException: Connection timed out: no further information

So a similar error message, but this time a connection timeout. Is maybe the problem connecting from within IntelliJ where I execute the mvn spring-boot:run command, to Docker that runs in WSL?

I tried by disabling the antivirus software and local firewall and WIFI, but those didn't work either, at most a different error message like:

Caused by: java.net.NoRouteToHostException: No route to host: no further information

And even with the mysql shell client does it give an error (bit less clear):

mysql -h 172.17.0.2 -P 3306 --protocol=tcp -u root -p
Enter password:
ERROR 2003 (HY000): Can't connect to MySQL server on '172.17.0.2' (11)

Solution

Then I stopped my container, started a new one with explicitly ports-mapping specified:

docker run --name recipesmysql8v2 -p 3306:3306 -d mysql/mysql-server:8.0

docker ps output:
CONTAINER ID        IMAGE                    COMMAND                  CREATED             STATUS                   PORTS
    NAMES
819333cf718e        mysql/mysql-server:8.0   "/entrypoint.sh mysq…"   2 minutes ago       Up 2 minutes (healthy)   0.0.0.0:3306->3306/tcp, :::3306->3306/tcp, 33060-33061/tc
p   recipesmysql8v2

Then a different error message for mysql -h 127.0.0.1 -P 3306 --protocol=tcp -u recipes -p appeared:

ERROR 1130 (HY000): Host '172.17.0.1' is not allowed to connect to this MySQL server

That looked promising.

Note: due to having a new container, I had to reset the OTP for user 'root' again of course. You can find that OTP by issuing docker logs recipesmysqlv2 | grep GENERATED.
Then issue these commands:

docker exec -it your_container_name_or_id bash
mysql -u root -p
Enter password: <enter the one found with the above grep shell command>
ALTER USER 'root'@'localhost' IDENTIFIED BY 'your secret password';

Create the Spring Boot application database again: create database recipes;
Add the Spring Boot application user again: create user 'recipes'@'%' identified by 'L7z$11Oeylh4';

Give that user only the necessary permissions:
grant create, select, insert, delete, update on recipes.* to 'recipes'@'%';

After that, these entries should be in the mysql.user table:
mysql> SELECT host, user FROM mysql.user;
+-----------+------------------+
| host      | user             |
+-----------+------------------+
| %         | recipes          |
| localhost | healthchecker    |
| localhost | mysql.infoschema |
| localhost | mysql.session    |
| localhost | mysql.sys        |
| localhost | root             |
+-----------+------------------+
6 rows in set (0.00 sec)


Note the recipes user entry with host '%', which allows access from any host, which you probably want to make more secure in a production environment. See https://downloads.mysql.com/docs/mysql-secure-deployment-guide-8.0-en.pdf for tips.

Now you should be able to connect from the mysql client prompt in several ways:

mysql -h 127.0.0.1 -P 3306 --protocol=tcp -u recipes -p
mysql -h localhost -P 3306 --protocol=tcp -u recipes -p
mysql -h 0.0.0.0 -P 3306 --protocol=tcp -u recipes -p

Note that the 172.17.0.2 still does not connect! For that to work you'll have to probably add that host to the above mysql.user table (not tried to see if that works).

Instead of mysql client you can also use the standard *nix command telnet to see if at least the port is reachable:

telnet 127.0.0.1 3306
Trying 127.0.0.1...
Connected to 127.0.0.1.
Escape character is '^]'.


(I don't remember what it showed when the initial issue with the docker container named 'recipesmysql8' was there)

And after starting the Spring Boot application: connection worked and tables and indexes were created!

Note: only from within the docker image can you connect like this: docker exec -it recipesmysql8v2 bash and execute mysql -u root -p after having issued ALTER USER 'root'@'localhost' IDENTIFIED BY 'nR128^n8f3kx';
Because running mysql -h 127.0.0.1 -P 3306 --protocol=tcp -u root -p from within the commandline WSL still gives: ERROR 1045 (28000): Access denied for user 'root'@'172.17.0.1' (using password: YES)

Probable cause: when you only have MySql in a Docker container, it is not in the same "network" as Docker containers, so the port 3306 is not reachable from outside Docker runtime. So you will have to tell Docker how you want to expose the port(s). Another way to solve this is to have the Spring Boot application also as a Docker application; and potentially configure it via docker-compose, see here for an example on how to do this: https://www.javainuse.com/devOps/docker/docker-mysql.


Wednesday, April 6, 2022

Configuring MySQL test-containers in your Spring Boot Java Integration Tests

Introduction

In your Integration Tests (IT) you often try to use the H2 in-memory database, to improve the speed of your integration tests. But on the other hand you want to mimic the production database as much as possible in your integration-tests.

Setting H2 in MySQL database compatibility mode tries to emulate MySQL as much as possible, but only a small subset of the differences are implemented. What for example not works correctly in H2 for JSON fields is that it escapes strings with "". For that reason you usually want to switch to for example starting a Docker database testcontainer in your IT tests, which uses a real MySQL database. With the Java-specific version in https://github.com/testcontainers/testcontainers-java.


Configuration

There are several good-to-know tips when configuring the testcontainers in your ITs.

  1. The simplest configuration is using a datasource URL in the Spring Boot properties file. This has the disadvantage that whatever database name you specify, the testcontainers library still creates a DB named 'test'. So below it will be named 'integration_test_db' you'd think, but it is still named 'test' when the IT runs:

    spring.datasource.url=jdbc:tc:mysql:5.7.32:///integration_test_db?sessionVariables=sql_mode='STRICT_TRANS_TABLES'&TC_MY_CNF=mysql&TC_INITSCRIPT=mysql/init_mysql_integration_tests.sql

    To be able to do everything on the started database, including giving it the name you want, use this URL (or see below the Java version). Notice the user 'root' in the URL:
    spring.datasource.url=jdbc:tc:mysql:5.7.32:///integration_test_db?user=root&password=&sessionVariables=sql_mode='STRICT_TRANS_TABLES'&TC_MY_CNF=mysql&TC_INITSCRIPT=mysql/init_mysql_integration_tests.sql

    Via: https://github.com/testcontainers/testcontainers-java/issues/932

  2. To initialize your database, specify the script via this extra datasource URL variable:

    TC_INITSCRIPT=mysql/init_mysql_integration_tests.sql

    Note the default directory it looks in is ..../resources for the scripts. So the full path is ..../resources/mysql/

  3. An example to prevent GROUP BY error from strict mode, add this in your TC_INITSCRIPT:

    SET GLOBAL sql_mode = 'STRICT_TRANS_TABLES';
    SET SESSION sql_mode = 'STRICT_TRANS_TABLES';


  4. To configure it in the IT Java class itself:

    @RunWith(SpringRunner.class)
    @SpringBootTest(classes = { SomeClassA.class, SomeClassB.class, ApplicationConfiguration.class}, webEnvironment = SpringBootTest.WebEnvironment.RANDOM_PORT)
    @TestPropertySource(locations = {
            "classpath:/application-test-mysql.properties" })
    @ContextConfiguration(initializers = {ThisITClass.Initializer.class})

    static class Initializer implements ApplicationContextInitializer<ConfigurableApplicationContext> {
            public void initialize(ConfigurableApplicationContext configurableApplicationContext) {
                TestPropertyValues.of(
                        "spring.datasource.url=" + mySQLContainer.getJdbcUrl(),
                        "spring.datasource.username=" + mySQLContainer.getUsername(),
                        "spring.datasource.password=" + mySQLContainer.getPassword()
                ).applyTo(configurableApplicationContext.getEnvironment());
            }
        }

    @ClassRule
    public static MySQLContainer mySQLContainer = new MySQLContainer<>("mysql:5.7.31")
                .withUsername("root") // So now you can do a GRANT too for example
                .withPassword("") // Only possible for user 'root'
                .withEnv("MYSQL_ROOT_HOST", "%")
                .withDatabaseName("integration_test_db") // So this name will now be used, not 'test'
                .withInitScript("mysql/init_mysql_integration_tests.sql")

                ;

  5. The MySQL docker image used in the tests is retrieved from DockerHub https://hub.docker.com/_/mysql

Wednesday, August 21, 2013

Migrating from MySQL 5.5 to 5.6.4 to have milliseconds/fractional seconds support

Before MySQL version 5.6.4, MySQL does not support milliseconds (more precise: fractional seconds) in TIME, TIMESTAMP and DATETIME!

In a project I was on, timestamps are used for versioning of entities via the JPA @Version annotation. So it's essential for correct optimistic locking, otherwise changes with a millisecond or bigger difference won't get a stale data exception. Since MySQL 5.6.4 milliseconds (fractional seconds) are supported by the newly introduced type TIMESTAMP(fsp), where fsp stands for fractional seconds precision. fsp ranges from 0 to 6 with 0 indicating there's no fractional part.

This blogpost describes how to migrate your current MySQL 5.5 version to 5.6.4, get it working correctly with fractional seconds support and problems that occurred.

Setup

- MySQL 5.5
- JPA 2.0
- Spring 3.1.2
- Hibernate 4.2
- Ubuntu 12.04
- Tomcat 7

JPA @Version annotation used for all entities:
@Version
@Column(nullable = false)
@Temporal(TemporalType.TIMESTAMP)
private Date version;


Possible solutions

  1. Put in an interceptor for Hibernate such that milliseconds are removed before inserting. But then you only have optimistic locking correctly working for updates that don't occur within a second. More details here
  2. Change the version field into a long, so don't store it as a TIMESTAMP. 
  3. Try to put something else smart in the application logic itself. 
  4. Put in a columnDefinition on the column: http://stackoverflow.com/questions/811845/setting-a-jpa-timestamp-column-to-be-generated-by-the-database
  5. Upgrade to 5.6.4.

Selected Solution

Together with the Product Owner it was decided to go for option 5. That means the minimal MySQL requirement for the application had to be upped to 5.6.4. That was acceptable; if a company is a MySQL shop, then usually they don't mind using a new(er) version of MySQL.
Option 4 was dismissed because that introduced a MySQL database dependency, which that project tries to avoid as much as possible.

Implementation

  1. Upgrade MySQL from 5.5 to 5.6.4. Basically following the steps from here: http://www.peterchen.net/2013/02/20/en-how-to-install-mysql-5-6-on-ubuntu-12-04-precise/
    The exact MySQL version I used was: http://dev.mysql.com/get/Downloads/MySQL-5.6/mysql-5.6.13-debian6.0-x86_64.deb/from/http://cdn.mysql.com/

  2. But a few more things are needed. For one thing, you need an up-to-date Connector/J, at least 5.1.24. Follow these steps to upgrade it:
    1. Download it from: http://dev.mysql.com/get/Downloads/Connector-J/mysql-connector-java-5.1.26.zip/from/http://cdn.mysql.com/
    2. Stop Tomcat
    3. Remove the old version:

      sudo rm /usr/share/tomcat7/lib/mysql-connector-java-5.0.8-bin.jar
    4. Put in the new version:

      sudo cp mysql-connector-java-5.1.26/mysql-connector-java-5.1.26-bin.jar /usr/share/tomcat7/lib/
    5. Restart Tomcat
    6. Done.

  3. Now you need to make sure columns are created as TIMESTAMP(fsp) to get the fractional precision, instead of TIMESTAMP which Hibernate uses by default. Decided was to go for millisecond accuracy, so TIMESTAMP(3). For that, a Hibernate dialect resolver was put in place that registers another column type for java.sql.Types.TIMESTAMP:

    public class FixMysql5Dialect extends MySQL5Dialect {

        public FixedMysql5Dialect() {
            registerColumnType(java.sql.Types.BOOLEAN, "bit");
            registerColumnType(java.sql.Types.TIMESTAMP, "timestamp(3)");
        }
    }

    Note also the boolean fix :)

    The resolver:
    ...
    private final DialectResolver standardDialectResolver = new StandardDialectResolver();

    @Override

    public Dialect resolveDialect(DatabaseMetaData metaData) throws JDBCConnectionException {

    Dialect dialect = standardDialectResolver.resolveDialect(metaData);

    if (dialect instanceof MySQL5Dialect) {

    return new FixedMysql5Dialect();

    }
    return dialect;
    .....

  4. Configure it in the Spring JavaConfig:

    map.put("hibernate.dialect_resolvers", MyHibernateDialectResolver.class.getName());

  5. Done

Troubleshooting


  • Problem: After restarting the application and loading the pre-existing testdata, an exception started occuring:

    java.sql.SQLException: Value '0000-00-00 00:00:00.000' can not be represented as java.sql.Timestamp
  • Cause: the SQL import scripts were using:

    INSERT INTO ct (ID, VERSION, NAME) VALUES (1, '1970-01-01 00:00:00.001', 'a');

    Looking in the database, it turns out the import wasn't able to be converted correctly anymore! They all appeared as:

    | 1 | 0000-00-00 00:00:00.000 | a

    After trying out a couple of combinations, it turns out that "it" definitely doesn't like 1 january 1970!! All below inserts do work:

    '2013-08-05 12:32:34.233'
    '2000-01-01 00:00:00.233'
    '1999-01-01 00:00:00.233'
    '1999-01-01 00:00:00.001'
    '1990-01-01 00:00:00.001'
    '1971-01-01 00:00:00.001'

    Also failing are '1970-01-01 00:00:00.000' and '1500-01-01 00:00:00.001'.

    If you watch carefully on the (incorrect) inserts, you see there's a warning (put in red for clarity):

    INSERT INTO ct (ID, VERSION, NAME) VALUES (19, '1970-01-01 00:00:00.001', 'Test19');
    Query OK, 1 row affected, 1 warning (0.01 sec)

    To see the exact warning execute:

    show warnings\G
    Then you see:

    *************************** 1. row ***************************
    Level: Warning
    Code: 1264
    Message: Out of range value for column 'VERSION' at row 1

    So the entered values are just not valid. Couldn't find out why they are not accepted, if you find it, leave it in the comments!!

    In the scripts we decided to use '1971-01-01 00:00:00.001' for the inserts.

Wednesday, October 17, 2012

Lessons learned Seam 2.2 project

Quick post with some bullet points of lessons learned during my last (and first) Seam project:

  • Seam 2.2
  • Hibernate 3.3.1
  • JEE 5
  • EJB 3.0
  • JSF 1.2
  • Richfaces 3.3
  • JBoss 5.1
  • Drools 5
  • SQLServer 2008
  • MySql 5.x
  • TestNG
  • Hudson
Seam
- To have a navigation for a method with a parameter like exportSelected(String value): see Seam navigation based on a function with parameters
- If your Seam app keeps re-deploying (restarting) when using JBoss within Eclipse: delete all files that end with 'dia' in your WEB-INF dir. See: Seam keeps redeploying For example, I modified pages.xml, which apparently created a pagesdia (or similar) file... after removing that one, it worked fine again.

Hibernate
- To see which validator fails on a persist():


    try {
        entityManager.persist(verbinding);
    } catch (InvalidStateException e) {     
        for (InvalidValue invalidValue : e.getInvalidValues()) {         
            System.err.println("--------------> create(): exception Instance " +
               "of bean class: " + 
               invalidValue.getBeanClass().getSimpleName() +                  
               " has an invalid property: " + invalidValue.getPropertyName() +
               " with message: " + invalidValue.getMessage());     
        } 
	throw new RuntimeException(e);
    }


MySql
- To see data in better format in MySQL: show engine innodb status\G (so add the \G to a query)

Hibernate/JPA
- NamedQueries are loaded and parsed at startup time, so that's an advantage above em.createQuery() which are only parsed and evaluated at runtime. So with NamedQueries you get the errors sooner.

Drools
To solve this error in Drools decision table .XLS spreadsheet:


   [testng] DEBUG [test.service.drools.DroolsHandling] getKnowledgeBase: getting path info from settings service
   [testng] DEBUG [test.service.drools.DroolsHandling] getting test.service.drools.DroolsHandling ruletable file: HandlingModelTest.xls
   [testng] DEBUG [test.service.drools.DroolsHandling] getKnowledgeBase: Trying to open a File
   [testng] WARN  [jxl.read.biff.NameRecord] Cannot read name ranges for Excel_BuiltIn__FilterDatabase_1 - setting to empty
   [testng] WARN  [test.service.drools.DroolsHandling] There are errors in the decision table file
   [testng] WARN  [test.service.drools.DroolsHandling] Decision table error: message=[ERR 102] Line 9:16 mismatched input '"DroolsHandling6"' expecting ']' in rule "DroolsData_12" in pattern stringDataset
   [testng] WARN  [test.service.drools.DroolsHandling]     line: 9
   [testng] WARN  [test.service.drools.DroolsHandling] Decision table error: message=[ERR 102] Line 9:35 mismatched input '"Prefab"' expecting ']' in rule "DroolsData_12" in pattern stringDataset
   [testng] WARN  [test.service.drools.DroolsHandling]     line: 9
   [testng] WARN  [test.service.drools.DroolsHandling] Decision table error: message=[ERR 102] Line 22:16 mismatched input '"DroolsHandling6"' expecting ']' in rule "DroolsData_12" in rule "DroolsData_13" in pattern stringDataset
   [testng] WARN  [test.service.drools.DroolsHandling]     line: 22


Make sure your definition has all the cells merged that contain a condition! For example, check the red arrow pointing at the border of the cells between G9 and H9.
The last cell for the condition Prefab is not merged (i.e one cell) with all the other conditions. Here's now how it should be: see again the red arrow, there's no cell separation anymore, all condition columns are now merged into 1 cell.


- A space in a condition in a decision spreadsheet can cause a non-match! E.g GATE VALVE is not matched. Fixed it by always replacing a ' ' with an '_'.

Sunday, March 21, 2010

Best of this Week Summary 15 March - 21 March 2010

  • Twitter and Digg are moving from MySQL to Cassandra (a highly scalable second-generation distributed database, bringing together Dynamo's fully distributed design and Bigtable's ColumnFamily-based data model; a Facebook opensourced project). The reason for Digg for the move "is the increasing difficulty of building a high-performance, write-intensive application on a data set that is growing quickly, with no end in sight. This growth has forced them into horizontal and vertical partitioning strategies that have eliminated most of the value of a relational database, while still incurring all the overhead".
    Twitter has about the same reason: "No single points of failure", "Highly scalable writes (we have highly variable write traffic)", and "A healthy and productive open source community".
    Twitter tried HBase, Voldemort, MongoDB, MemcacheDB, Redis, Cassandra, and HyperTable amongst others before deciding to go with Cassandra. Interesting to read is how they slowly rollout Cassandra to limited sets of users.
    An introduction to Cassandra to get it up and running can be found here.


  • A short post on how to implement Automatic testing Oracle Service Bus using Hudson, Maven and SoapUI.

  • What to expect from HTML5 for webdevelopers.

Sunday, November 22, 2009

Best of this Week Summary 16 November - 22 November 2009

Thursday, January 15, 2009

Setting up an Amazon AMI with Java and MySQL on EBS using the AWS Management Console

Introduction

In this post I'll describe the steps I performed to create my own Amazon Machine Image using the AWS Management Console and Windows XP as my local machine.
Just recently Amazon released their AWS Management Console. It's still in beta, but it makes life already so much easier: before it was available, you had to use quite a few scripts to get your own AMI ready.

The final AMI will have installed on it:

  • Fedora Core 8

  • 32-bit architecture

  • Java JDK 7 (1.7.0)

  • JEE 5

  • Tomcat 5.5.27

  • Apache 2.2.9

  • MySQL 5.0.45

I also will setup MySQL on Elastic Block Storage such that you can shutdown the AMI and not lose your MySQL data.
In the end you should be able to deploy for example a Java .war file (if correctly assembled of course) with the following frameworks without any problem:

  • Spring 2.5

  • Hibernate 3.2.5

  • Wicket 1.3

  • Sitemesh 2.2.1

  • Quartz 1.6.2

For the steps described below, I'm assuming you've already setup your keys and know how to start an AMI and get access to it via a browser and putty. If you don't know how to do this, on the AMC homepage there's a good introductionary video on how to do this.

Starting up an instance

You can start with a very basic AMI with only an OS installed on it, or use one that has already a lot more software installed on it.
As a starting point I used the publicly available Java Web Starter AMI. Notice that you can lookup AMIs without being logged in into AWS.
Start the instance such that you see something like this:
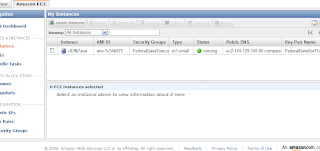

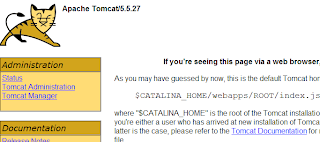
Check that Tomcat is running by going to the public IP of the instance. In my case I had to go to http://ec2-174-129-150-80.compute-1.amazonaws.com/. And I do see Tomcat:


Setting up MySQL and Tomcat passwords

In the basic AMI I'm using, MySQL root has no password and the Tomcat Manager login is admin/password. You don't want that in your final version, so let's change that. First login with putty to the instance (don't forget to use the ppk version of the key). You can login as root w/o a password because the key takes care of the authentication. Then change the passwords:
  1. MySQL password: login to mysql:


    mysql -u root


    And execute:


    GRANT ALL ON *.* to 'root'@'localhost' IDENTIFIED BY 'mysecretpassword'.


    Note that we're only allowing root access from the localhost (the AMI itself) and of course replace the 'mysecretpassword' text for your own password. Double check that you can now login with the new password. If not, you might have to restart the AMI (all changes are lost) and try again.

  2. Tomcat password:


    cd /usr/share/tomcat5/conf.


    Edit tomcat-users.xml, change the password field with value 'password' where it says username="admin" to your desired new password. Restart Tomcat to let the change take effect: /etc/init.d/tomcat5 restart. Go to your instance again with your browser and check that the new Tomcat Manager login works.


If there's anything else you like to change on your AMI, you should do it now, for as long as you don't terminate the AMI instance. Tip: Reboot is fine btw, that keeps the AMI settings!

Setting up MySQL on Amazon EC2 with Elastic Block Store

As a basis for these steps I'll be using "Running MySQL on Amazon EC2 with Elastic Block Store". The steps given in there are written prior to the Amazon AWS Management Console being available, so here I'll describe the changes necessary using the AMC. The steps in the article are also specificly for Ubuntu 8.04 LTS, but as you can see from the AMI I use as a starting point, I'm using Fedora 8. Only some of the commands differ, for the rest the steps work for both OSs. Í'll also be setting up Ext3 as filesystem, not XFS.
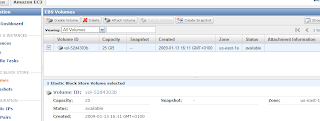
  1. Create an EBS volume with the AMC: click on Volumes on the left and click on the 'Create Volume' button. Enter the required capacity. AFAIK as long as you're not using the datablocks, you're not charged. So I put in 25GB as size. Select a zone (don't know how much it matters which one you pick, just make sure you stay in the same zone as your AMI). This should result in something like this:

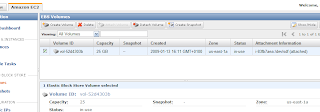
    Now attach the volume to the instance as device /dev/sdf (in the original article sdh is used) via the 'Attach Volume' button. When successful, the 'Attachment Information' status field has changed to "attached":

  2. Now let's format the volume and mount it. For that I deviated from the article and followed the steps you can also see when you click on the 'Help' button on the (current) EBS Volumes page in AMC. Thus execute in your putty session:


    mkfs -t ext3 /dev/sdf


    Hit OK on any questions. Then create a directory to mount the EBS volume on. Let's use a more distintive name than '/vol'. Let's create:


    mkdir /ebsmnt


    Then mount it:


    mount /dev/sdf /ebsmnt


    Note: at my first effort, I wanted to use /mnt/data (in the Volumes 'Help' button in the AMC they also give /mnt as an example), so I created that directory. But: the bundling command you'll see below does not include the /mnt directory by default! So then the /mnt/data directory doesn't exist on the new AMI, and then the auto-mount from fstab at bootup of the AMI will always fail for that reason!

  3. Make sure the mount is performed at startup by adding it in /etc/fstab:


    /dev/sdf /ebsmnt ext3 defaults 0 0


  4. Backup the new config file to the EBS into its own separate directory, maybe you need it some time:


    mkdir /ebsmnt/configs
    rsync -a /etc/fstab /ebsmnt/configs/


Now let's tell MySQL to use the EBS volume to store its databases.
  1. Stop MySQL:


    /etc/init.d/mysqld stop


    And to be safe:


    killall mysqld_safe


  2. Move the existing database files. Since there isn't much yet except a couple of test databases, not much needs to be done. First let's make a separate dir for MySQL on the EBS volume:


    mkdir /ebsmnt/mysql


    Then:


    cd /ebsmnt/mysql
    mkdir lib log


    And start moving stuff:


    mv /var/lib/mysql /ebsmnt/mysql/lib/
    mkdir /var/lib/mysql # Note that we need this dir for the mysql.sock file
    chown mysql:mysql /var/lib/mysql # Give it again the correct permissions
    mv /var/log/mysqld.log /ebsmnt/mysql/log/


  3. Tell MySQL to look on the mounted EBS from now on. Edit /etc/my.cnf and change it as below. The '# Was: ' indicates wat was there originally:


    [mysqld]
    # Was: datadir=/var/lib/mysql
    datadir=/ebsmnt/mysql/lib/mysql
    socket=/var/lib/mysql/mysql.sock
    user=mysql
    # Default to using old password format for compatibility with mysql 3.x
    # clients (those using the mysqlclient10 compatibility package).
    old_passwords=1

    [mysqld_safe]
    # Was: log-error=/var/log/mysqld.log
    log-error=/ebsmnt/mysql/log/mysqld.log
    pid-file=/var/run/mysqld/mysqld.pid


    Note that I put the log-error file also on the mount. The reason for this is that I want to have to logfile saved even when I shutdown an instance. If you don't care, you can leave it as it was.
    Another advantage I found out by practice is that when you've set the log-error like above, you can't detach the volume because MySQL is still accessing that logfile. So you can't accidentally detach, maybe leaving MySQL in an inconsistent state, which is a good thing (I mean not leaving MySQL in an inconsistent state).
    In that case you'll have to stop your instance w/o detaching it first (this makes sure MySQL shutsdown first). Update: as far as I can tell from /etc/rc.d, unmounting from fstab is done as the last thing, so doing a 'Terminate' of the instance to automatically let the shutdown sequence do the unmount and unattach of the volume should be safe.
    Note also that I didn't modify the mysql.sock socket file. Advantage is that I can keep using mysql and mysqladmin the way they are. If you would change the location of the socket file, say to /ebsmnt/mysql/lib/mysql/mysql.sock, then you will have to start mysql and mysqladmin with the '-S ' option.

  4. Backup the new config file to the EBS, just to be safe:


    rsync -a /etc/my.cnf /mnt/configs/


  5. Restart MySQL again:


    /etc/init.d/mysqld start


    You can check everything is going ok by tailing the logfile (on the mount of course):


    tail -f /ebsmnt/mysql/log/mysqld.log


  6. To see later on that the data is still available after having terminated the AMI, create an example database:


    mysql -p -e 'CREATE DATABASE esb_test_database'


So now the database is setup on the EBS. If you want to create snapshots, you can do that via the AWS Console or follow the instructions in the mentioned article, which also includes automated snapshots and cleaning up everything that has been created in EBS when following the above steps (handy to know, because otherwise you'll be charged for using it until the end of time! hahahahaaa).

So now the AMI is how I want it to be. Let's store it on S3 to make it persistent.

Bundling the new Linux AMI

This part is based upon Bundling a Linux or UNIX AMI from the online EC2 Developer Guide. There's currently almost no AWS Management Console facilities to do this, so we'll have to use the AMI Tools on the host AMI.

  1. Installing the AMI Tools: luckily they are already installed on the AMI we're using (how you'd think it got created? :-). Try this command to see that they are indeed installed (well of course that only proves this one is installed ;-):


    ec2-bundle-image --manual


    If you're using an AMI that doesn't have these tools installed, follow the steps in section 'Installing the AMI Tools' in the article.

  2. Bundling an AMI Using the AMI Tools: Let's do the bundling in /tmp:


    cd /tmp


    Then to bundle execute:


    ec2-bundle-vol --prefix Fedora8-JEE5-JDK7-Tomcat55-MySQL50 -k
    <private_keyfile> -c <certificate_file> -u <user_id>


    Note that I specify a prefix. By default it's 'image', so you'll get 'image.manifest.xml'. When you look at all the AMIs out there, they should be more descriptive than that, so I used Fedora8-JEE5-JDK7-Tomcat55-MySQL50.
    The other parameters are explained in the article. The user_id you can find in the AMC under the 'Your Account --> Account Activity' menu.
    Your private_keyfile is the pk*.pem file, which you need to upload to the AMI (host). The same goes for the cert*.pem file. Note I put them in /mnt so they won't get put on the new AMI, which you don't want!
    An example pscp copy from Windows command prompt to get the files over would be:


    pscp -i Fedora8.ppk pk*.pem cert*.pem
    root@ec2-174-129-150-80.compute-1.amazonaws.com:/mnt/


    Fedora8.ppk is the filename of the key generated for putty with puttygen, as clearly described in the before-mentioned video on the AMC homepage.
    You can accept all the defaults at the prompts.
    The warnings:


    "NOTE: rsync with preservation of extended file attributes failed. Retrying
    rsync without attempting to preserve extended file attributes..."


    and


    "NOTE: rsync seemed successful but exited with error code 23. This probably means
    that your version of rsync was built against a kernel with HAVE_LUTIMES defined,
    although the current kernel was not built with this option enabled. The bundling
    process will thus ignore the error and continue bundling. If bundling completes
    successfully, your image should be perfectly usable. We, however, recommend that
    you install a version of rsync that handles this situation more elegantly.
    "

    are (apparently) no serious problem, so these can be ignored.


    Note that a file with the same name as the --prefix parameter gets created in the directory where you started the command.
    Notice from the manual of the above command, that it skips /mnt (amongst others), so in case you mounted it there, the command won't include the whole mounted EBS in the bundle (luckily)!
    Note also that it seems the script is smart enough to not include the mounted /ebsmnt data either. If you want to be really sure, umount it first before running the bundle command.
    Running the command takes about 5-10 minutes.
    The message


    "Unable to read instance meta-data for product-codes"


    at the end does not seem to be a serious problem, I haven't found any problems at least :-).

Uploading a Bundled AMI

Here you can just follow the steps in the article, thus:


ec2-upload-bundle -b <bucket> -m Fedora8-JEE5-JDK7-Tomcat55-MySQL50.manifest.xml
-a <access_key> -s <secret_key>


The two keys should be under the menu 'Your Account --> Access Identifiers' in the AWS Mangement Console.
You can imagine being a directory in your S3 storage. Let's use "mybucket" as name.

Registering the AMI

There are two ways of registering. Via the AMC is described first. Then the old way via the Amazon EC2 API command line tools as in the article is described.

Via AWS Console
  1. Go to the 'AMIs' page and click the 'Register New AMI' button.

  2. In the popup enter the path to your above uploaded manifest file, including the bucket. So the whole path becomes:


    http://s3.amazonaws.com:80/mybucket/Fedora8-JEE5-JDK7-Tomcat55-MySQL50.manifest.xml


    Thus the popup would look something like this:
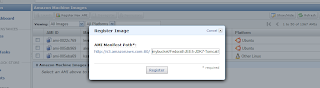


  3. Hit 'Register' to register the AMI. Too late for this tutorial I noticed this 'Register New AMI' button, thus here my personal practical experience ends for this option. I used the command line tools as described below. But I guess the result will be the same: a registered AMI!

Via Amazon EC2 API command line tools

For this I used the steps described here in the AWS Developer Guide.
For this you need to download and install the Amazon EC2 API command line tools on your local machine and a Java Runtime, I just used the Java 5 JDK.
Then run:


ec2-register mybucket/Fedora8-JEE5-JDK7-Tomcat55-MySQL50.manifest.xml


where mybucket is the you specified in the above 'ec2-upload-bundle' command.
It returns the id of the created AMI, e.g.


IMAGE ami-aabb5cc3


Now check that you can find it in the AMIs 'Owned By Me' in the AMC by searching for the above AMI ID ami-aabb5cc3. And yes there it is:
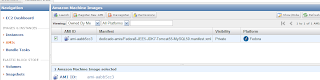

If you want, you can make it public such that other users can see it etc. But I won't describe that here.

That's it! And as final step:

Let's see if the new AMI actually works

Let's see if it starts up, the EBS volume can be connected to it and the newly created test database is still there.
First terminate the running (modified) AMI. Note that you can't detach, since MySQL still uses the volume!
Start the new AMI. Now the problem is that you can't attach until Fedora OS is starting to boot. But /ebsmnt can't be mounted until it is attached! Thus MySQL can't find its data.
So what you can do is run the 'ec2-attach-volume' command until it succeeds, or check the instance status until it reaches a "specific intermediate state" and then run the ec2-attach-volume command. This way you "hope" that the attachment succeeds before the mounting. I never managed to get this working.
The safest solution seems to attach the volume when the AMI has reached status 'running', and then reboot the instance.
Of course you can put this all in scripts to automate it as much as possible.

Note that my AWS Mangement Console did not show my newly running AMI instance when trying to attach a volume via the AMC. There might be some delay in status updates(?). The command 'ec2-attach-volume' did work in that case. An example of that command on your local workstation:


ec2-attach-volume -d /dev/sdf -i i-ec8f0e85 vol-52d4303b


Also don't forget to use the same zone for the volume and the instance, otherwise you also might not see the running instance in the 'Attach' popup window.

Done

Did you notice BTW what a large amount of memory you get, even for a small AMI instance:


Mem: 1747764k total, 176724k used, 1571040k free, 12236k buffers
Swap: 917496k total, 0k used, 917496k free, 64340k cached


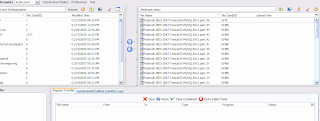
Tip: for managing your AMI and other data that you (want to) store on Simple Storage Service S3, you can either use the more manual tools from Amazon or the great graphical Amazon S3 Firefox Organizer (S3Fox) Firefox plugin.
Monday, August 11, 2008

Best of this Week Summary 04 August - 10 August 2008

  • Good article on the current status of Ajax frameworks. Most interesting is the notion that in 2005 there were already 48 Ajax frameworks and in 2007 there were already 240! Clearly the expected consolidation did not occur yet. Nice conclusion I agree with at the end: for Ajax use Prototype and script.aculo.us, they have been around for 3-4 years. For more heavyweight RIA applications use Flex (Silverlight is in a too early stage). What about AIR? I'd say the same. Though AIR needs its own runtime, so is a bit different.

  • Good intro on google's recently introduced open sourced binary encoding format Protocol Buffers, including references to pros and cons articles.

  • Recently the Open Web Foundation was launched. It "[...] will be focused on developing the technical specifications of protocols used for communication and inter-operability between applications on the web. The foundation will also set out the legal terms and best practices for the use and transport of both private and public data, and the usage of web services". Here's how it relates to the Data Portability Working Group and who's in it.

  • Microsoft is now sponsoring the Apache Software Foundation. Note that is not a move away from IIS, as mentioned in the referred blog in the article.

  • Drizzle is the name of the new lightweight MySQL spin-off, which aims at systems that have to process massive amounts of concurrency (mostly reads) on multicore systems. Think Cloud and Net(?) applications. Or, as they say it: "A High-Performance Microkernel DBMS for Scale-Out Applications ".

  • Quite elaborate article and comparison on how secure the current major web frameworks are.
    Discussed are: Struts, Spring MVC 2, Struts2, Spring, Webwork, Stripes, JSF, MyFaces, Wicket and MS .Net.

Saturday, July 5, 2008

Best of this Week Summary 29 June - 6 July 2008

Sunday, April 6, 2008

Best of this Week Summary 31 March - 6 April 2008

Saturday, December 29, 2007

Best of this Week Summary 17 December - 29 December 2007

  • Always interesting, a look inside "the kitchen of": the people from 37signals.com have provided some inside-info on the architecture of some of their sites: Backpack en Basecamp. For
    example they are using RoR, MySQL, S3 and memcached.

  • Post (related to the ESB entry in my post last week) regarding the rise of Tomcat as "application" server, in relation with the rise of Spring. Comparing Tomcat with WebLogic and WebSphere is more like comparing Oracle with MySQL. Tomcat is still not at the same level in certain areas as WebLogic and WebSphere, though it is making progress in these areas: clustering and high availability.

  • There's a new revised version of the free e-book from Microsoft on the most important security engineering activities that you should have in your development process: The Developer Highway Code. Written by Paul Maher (Microsoft UK) and Alex Mackman (CM Group Ltd).

  • Great news, version 2.0 of SoapIU has just been released. Improvements include webservice WSDL coverage and WS-Security completely refactored.