Setting up an Amazon AMI with Java and MySQL on EBS using the AWS Management Console
Introduction
In this post I'll describe the steps I performed to create my own Amazon Machine Image using the AWS Management Console and Windows XP as my local machine.Just recently Amazon released their AWS Management Console. It's still in beta, but it makes life already so much easier: before it was available, you had to use quite a few scripts to get your own AMI ready.
The final AMI will have installed on it:
- Fedora Core 8
- 32-bit architecture
- Java JDK 7 (1.7.0)
- JEE 5
- Tomcat 5.5.27
- Apache 2.2.9
- MySQL 5.0.45
I also will setup MySQL on Elastic Block Storage such that you can shutdown the AMI and not lose your MySQL data.
In the end you should be able to deploy for example a Java .war file (if correctly assembled of course) with the following frameworks without any problem:
- Spring 2.5
- Hibernate 3.2.5
- Wicket 1.3
- Sitemesh 2.2.1
- Quartz 1.6.2
For the steps described below, I'm assuming you've already setup your keys and know how to start an AMI and get access to it via a browser and putty. If you don't know how to do this, on the AMC homepage there's a good introductionary video on how to do this.
Starting up an instance
You can start with a very basic AMI with only an OS installed on it, or use one that has already a lot more software installed on it.As a starting point I used the publicly available Java Web Starter AMI. Notice that you can lookup AMIs without being logged in into AWS.
Start the instance such that you see something like this:

Check that Tomcat is running by going to the public IP of the instance. In my case I had to go to http://ec2-174-129-150-80.compute-1.amazonaws.com/. And I do see Tomcat:

Setting up MySQL and Tomcat passwords
In the basic AMI I'm using, MySQL root has no password and the Tomcat Manager login is admin/password. You don't want that in your final version, so let's change that. First login with putty to the instance (don't forget to use the ppk version of the key). You can login as root w/o a password because the key takes care of the authentication. Then change the passwords:- MySQL password: login to mysql:
mysql -u root
And execute:
GRANT ALL ON *.* to 'root'@'localhost' IDENTIFIED BY 'mysecretpassword'.
Note that we're only allowing root access from the localhost (the AMI itself) and of course replace the 'mysecretpassword' text for your own password. Double check that you can now login with the new password. If not, you might have to restart the AMI (all changes are lost) and try again. - Tomcat password:
cd /usr/share/tomcat5/conf.
Edit tomcat-users.xml, change the password field with value 'password' where it says username="admin" to your desired new password. Restart Tomcat to let the change take effect: /etc/init.d/tomcat5 restart. Go to your instance again with your browser and check that the new Tomcat Manager login works.
If there's anything else you like to change on your AMI, you should do it now, for as long as you don't terminate the AMI instance. Tip: Reboot is fine btw, that keeps the AMI settings!
Setting up MySQL on Amazon EC2 with Elastic Block Store
As a basis for these steps I'll be using "Running MySQL on Amazon EC2 with Elastic Block Store". The steps given in there are written prior to the Amazon AWS Management Console being available, so here I'll describe the changes necessary using the AMC. The steps in the article are also specificly for Ubuntu 8.04 LTS, but as you can see from the AMI I use as a starting point, I'm using Fedora 8. Only some of the commands differ, for the rest the steps work for both OSs. Í'll also be setting up Ext3 as filesystem, not XFS.- Create an EBS volume with the AMC: click on Volumes on the left and click on the 'Create Volume' button. Enter the required capacity. AFAIK as long as you're not using the datablocks, you're not charged. So I put in 25GB as size. Select a zone (don't know how much it matters which one you pick, just make sure you stay in the same zone as your AMI). This should result in something like this:
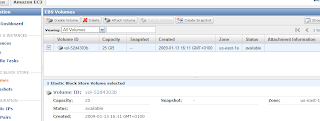
Now attach the volume to the instance as device /dev/sdf (in the original article sdh is used) via the 'Attach Volume' button. When successful, the 'Attachment Information' status field has changed to "attached":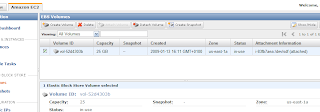
- Now let's format the volume and mount it. For that I deviated from the article and followed the steps you can also see when you click on the 'Help' button on the (current) EBS Volumes page in AMC. Thus execute in your putty session:
mkfs -t ext3 /dev/sdf
Hit OK on any questions. Then create a directory to mount the EBS volume on. Let's use a more distintive name than '/vol'. Let's create:
mkdir /ebsmnt
Then mount it:
mount /dev/sdf /ebsmnt
Note: at my first effort, I wanted to use /mnt/data (in the Volumes 'Help' button in the AMC they also give /mnt as an example), so I created that directory. But: the bundling command you'll see below does not include the /mnt directory by default! So then the /mnt/data directory doesn't exist on the new AMI, and then the auto-mount from fstab at bootup of the AMI will always fail for that reason! - Make sure the mount is performed at startup by adding it in /etc/fstab:
/dev/sdf /ebsmnt ext3 defaults 0 0 - Backup the new config file to the EBS into its own separate directory, maybe you need it some time:
mkdir /ebsmnt/configs
rsync -a /etc/fstab /ebsmnt/configs/


Now let's tell MySQL to use the EBS volume to store its databases.
- Stop MySQL:
/etc/init.d/mysqld stop
And to be safe:
killall mysqld_safe - Move the existing database files. Since there isn't much yet except a couple of test databases, not much needs to be done. First let's make a separate dir for MySQL on the EBS volume:
mkdir /ebsmnt/mysql
Then:
cd /ebsmnt/mysql
mkdir lib log
And start moving stuff:
mv /var/lib/mysql /ebsmnt/mysql/lib/
mkdir /var/lib/mysql   # Note that we need this dir for the mysql.sock file
chown mysql:mysql /var/lib/mysql # Give it again the correct permissions
mv /var/log/mysqld.log /ebsmnt/mysql/log/ - Tell MySQL to look on the mounted EBS from now on. Edit /etc/my.cnf and change it as below. The '# Was: ' indicates wat was there originally:
[mysqld]
# Was: datadir=/var/lib/mysql
datadir=/ebsmnt/mysql/lib/mysql
socket=/var/lib/mysql/mysql.sock
user=mysql
# Default to using old password format for compatibility with mysql 3.x
# clients (those using the mysqlclient10 compatibility package).
old_passwords=1

[mysqld_safe]
# Was: log-error=/var/log/mysqld.log
log-error=/ebsmnt/mysql/log/mysqld.log
pid-file=/var/run/mysqld/mysqld.pid
Note that I put the log-error file also on the mount. The reason for this is that I want to have to logfile saved even when I shutdown an instance. If you don't care, you can leave it as it was.
Another advantage I found out by practice is that when you've set the log-error like above, you can't detach the volume because MySQL is still accessing that logfile. So you can't accidentally detach, maybe leaving MySQL in an inconsistent state, which is a good thing (I mean not leaving MySQL in an inconsistent state).
In that case you'll have to stop your instance w/o detaching it first (this makes sure MySQL shutsdown first). Update: as far as I can tell from /etc/rc.d, unmounting from fstab is done as the last thing, so doing a 'Terminate' of the instance to automatically let the shutdown sequence do the unmount and unattach of the volume should be safe.
Note also that I didn't modify the mysql.sock socket file. Advantage is that I can keep using mysql and mysqladmin the way they are. If you would change the location of the socket file, say to /ebsmnt/mysql/lib/mysql/mysql.sock, then you will have to start mysql and mysqladmin with the '-S' option. - Backup the new config file to the EBS, just to be safe:
rsync -a /etc/my.cnf /mnt/configs/ - Restart MySQL again:
/etc/init.d/mysqld start
You can check everything is going ok by tailing the logfile (on the mount of course):
tail -f /ebsmnt/mysql/log/mysqld.log - To see later on that the data is still available after having terminated the AMI, create an example database:
mysql -p -e 'CREATE DATABASE esb_test_database'
So now the database is setup on the EBS. If you want to create snapshots, you can do that via the AWS Console or follow the instructions in the mentioned article, which also includes automated snapshots and cleaning up everything that has been created in EBS when following the above steps (handy to know, because otherwise you'll be charged for using it until the end of time!
So now the AMI is how I want it to be. Let's store it on S3 to make it persistent.
Bundling the new Linux AMI
This part is based upon Bundling a Linux or UNIX AMI from the online EC2 Developer Guide. There's currently almost no AWS Management Console facilities to do this, so we'll have to use the AMI Tools on the host AMI.- Installing the AMI Tools: luckily they are already installed on the AMI we're using (how you'd think it got created? :-). Try this command to see that they are indeed installed (well of course that only proves this one is installed ;-):
ec2-bundle-image --manual
If you're using an AMI that doesn't have these tools installed, follow the steps in section 'Installing the AMI Tools' in the article. - Bundling an AMI Using the AMI Tools: Let's do the bundling in /tmp:
cd /tmp
Then to bundle execute:
ec2-bundle-vol --prefix Fedora8-JEE5-JDK7-Tomcat55-MySQL50 -k
          <private_keyfile> -c <certificate_file> -u <user_id>
Note that I specify a prefix. By default it's 'image', so you'll get 'image.manifest.xml'. When you look at all the AMIs out there, they should be more descriptive than that, so I used Fedora8-JEE5-JDK7-Tomcat55-MySQL50.
The other parameters are explained in the article. The user_id you can find in the AMC under the 'Your Account --> Account Activity' menu.
Your private_keyfile is the pk*.pem file, which you need to upload to the AMI (host). The same goes for the cert*.pem file. Note I put them in /mnt so they won't get put on the new AMI, which you don't want!
An example pscp copy from Windows command prompt to get the files over would be:
pscp -i Fedora8.ppk pk*.pem cert*.pem
   root@ec2-174-129-150-80.compute-1.amazonaws.com:/mnt/
Fedora8.ppk is the filename of the key generated for putty with puttygen, as clearly described in the before-mentioned video on the AMC homepage.
You can accept all the defaults at the prompts.
The warnings:
"NOTE: rsync with preservation of extended file attributes failed. Retrying
rsync without attempting to preserve extended file attributes..."
and
"NOTE: rsync seemed successful but exited with error code 23. This probably means
that your version of rsync was built against a kernel with HAVE_LUTIMES defined,
although the current kernel was not built with this option enabled. The bundling
process will thus ignore the error and continue bundling.  If bundling completes
successfully, your image should be perfectly usable. We, however, recommend that
you install a version of rsync that handles this situation more elegantly.
"
are (apparently) no serious problem, so these can be ignored.
Note that a file with the same name as the --prefix parameter gets created in the directory where you started the command.
Notice from the manual of the above command, that it skips /mnt (amongst others), so in case you mounted it there, the command won't include the whole mounted EBS in the bundle (luckily)!
Note also that it seems the script is smart enough to not include the mounted /ebsmnt data either. If you want to be really sure, umount it first before running the bundle command.
Running the command takes about 5-10 minutes.
The message
"Unable to read instance meta-data for product-codes"
at the end does not seem to be a serious problem, I haven't found any problems at least :-).
Uploading a Bundled AMI
Here you can just follow the steps in the article, thus:
|
The two keys should be under the menu 'Your Account --> Access Identifiers' in the AWS Mangement Console.
You can imagine
Registering the AMI
There are two ways of registering. Via the AMC is described first. Then the old way via the Amazon EC2 API command line tools as in the article is described.Via AWS Console
- Go to the 'AMIs' page and click the 'Register New AMI' button.
- In the popup enter the path to your above uploaded manifest file, including the bucket. So the whole path becomes:
http://s3.amazonaws.com:80/mybucket/Fedora8-JEE5-JDK7-Tomcat55-MySQL50.manifest.xml
Thus the popup would look something like this: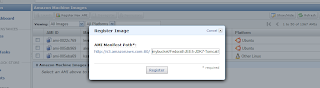
- Hit 'Register' to register the AMI. Too late for this tutorial I noticed this 'Register New AMI' button, thus here my personal practical experience ends for this option. I used the command line tools as described below. But I guess the result will be the same: a registered AMI!

Via Amazon EC2 API command line tools
For this I used the steps described here in the AWS Developer Guide.
For this you need to download and install the Amazon EC2 API command line tools on your local machine and a Java Runtime, I just used the Java 5 JDK.
Then run:
|
where mybucket is the
It returns the id of the created AMI, e.g.
|
Now check that you can find it in the AMIs 'Owned By Me' in the AMC by searching for the above AMI ID ami-aabb5cc3. And yes there it is:

If you want, you can make it public such that other users can see it etc. But I won't describe that here.
That's it! And as final step:
Let's see if the new AMI actually works
Let's see if it starts up, the EBS volume can be connected to it and the newly created test database is still there.First terminate the running (modified) AMI. Note that you can't detach, since MySQL still uses the volume!
Start the new AMI. Now the problem is that you can't attach until Fedora OS is starting to boot. But /ebsmnt can't be mounted until it is attached! Thus MySQL can't find its data.
So what you can do is run the 'ec2-attach-volume' command until it succeeds, or check the instance status until it reaches a "specific intermediate state" and then run the ec2-attach-volume command. This way you "hope" that the attachment succeeds before the mounting. I never managed to get this working.
The safest solution seems to attach the volume when the AMI has reached status 'running', and then reboot the instance.
Of course you can put this all in scripts to automate it as much as possible.
Note that my AWS Mangement Console did not show my newly running AMI instance when trying to attach a volume via the AMC. There might be some delay in status updates(?). The command 'ec2-attach-volume' did work in that case. An example of that command on your local workstation:
|
Also don't forget to use the same zone for the volume and the instance, otherwise you also might not see the running instance in the 'Attach' popup window.
Done
Did you notice BTW what a large amount of memory you get, even for a small AMI instance:
|
Tip: for managing your AMI and other data that you (want to) store on Simple Storage Service S3, you can either use the more manual tools from Amazon or the great graphical Amazon S3 Firefox Organizer (S3Fox) Firefox plugin.


Add to:
 Del.icio.us
 DZone
DZone
 Reddit
 Digg
Digg


